一、maven下载
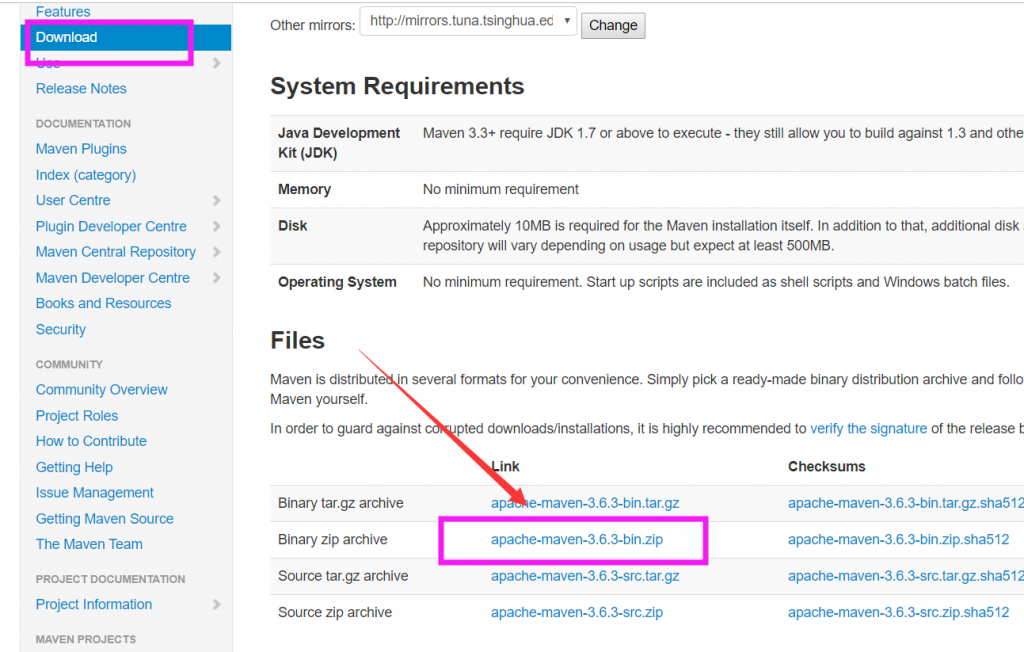
下载后解压到相应的路径
二、环境变量配置
此电脑→属性→高级系统设置→环境变量→系统变量→新建 MAVEN_HOME
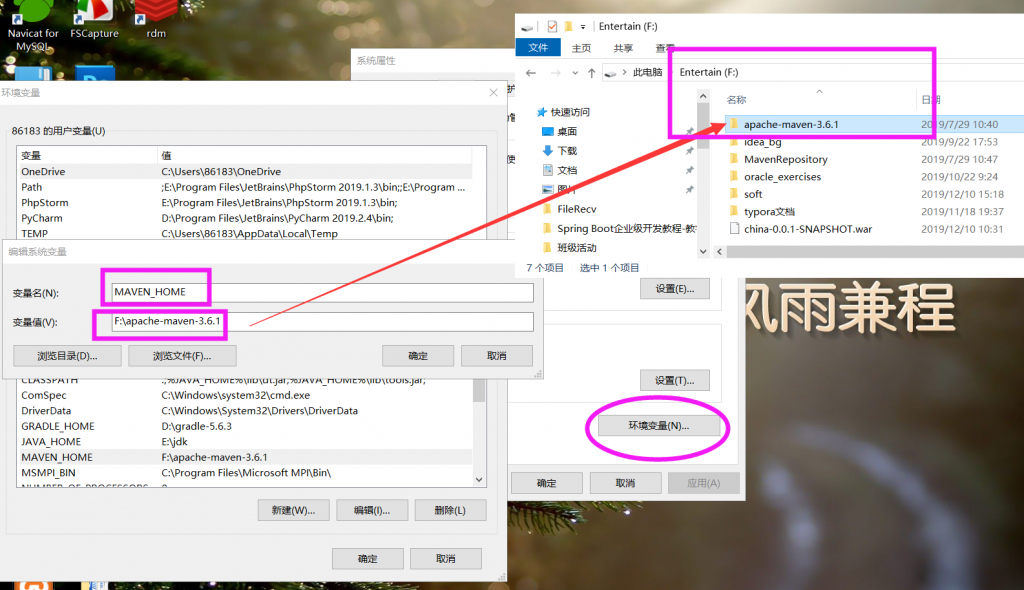
在Path环境变量下添加%MAVEN_HOME%\bin

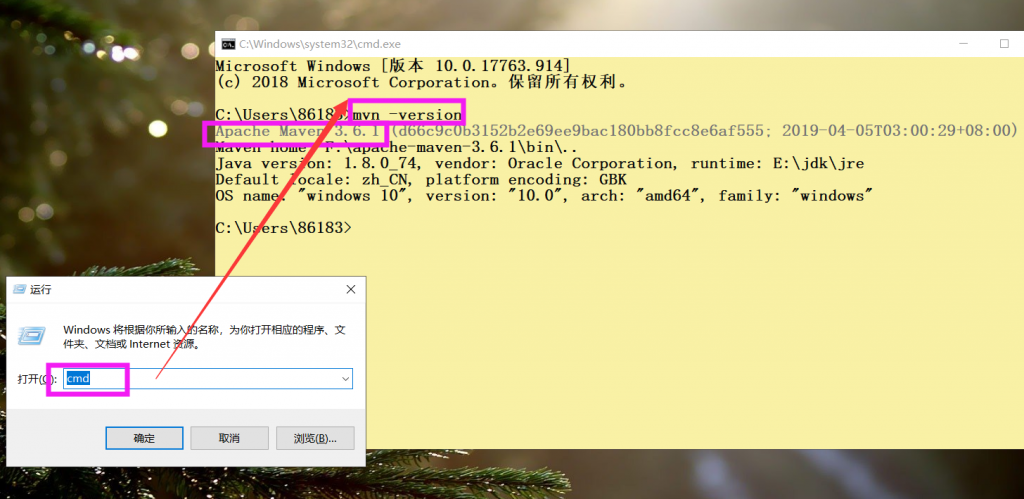
查看maven的版本,到此环境变量配置完成
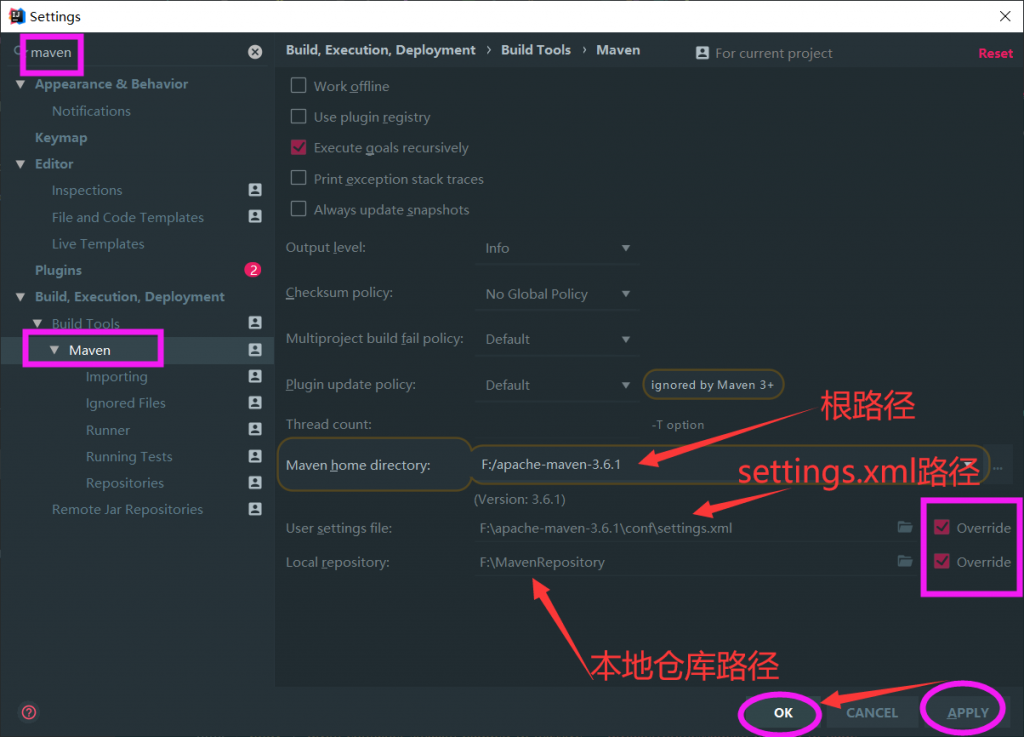
三、IDEA配置maven
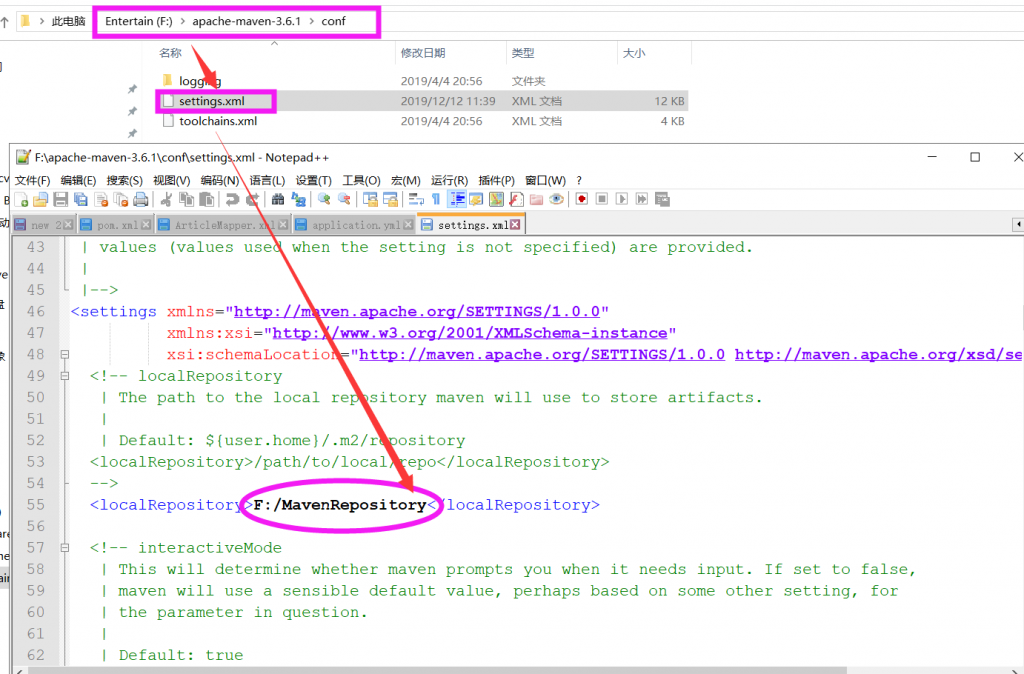
第一步:配置maven本地仓库
第二步:修改依赖下载地址
<mirrors>
        <mirror>
            <id>alimaven</id>
            <name>aliyun maven</name>
            <url>http://maven.aliyun.com/nexus/content/groups/public/</url>
            <mirrorOf>central</mirrorOf>
        </mirror>
        <mirror>
            <id>ui</id>
            <mirrorOf>central</mirrorOf>
            <name>Human Readable Name for this Mirror.</name>
            <url>http://uk.maven.org/maven2/</url>
        </mirror>
        <mirror>
            <id>jboss-public-repository-group</id>
            <mirrorOf>central</mirrorOf>
            <name>JBoss Public Repository Group</name>
            <url>http://repository.jboss.org/nexus/content/groups/public</url>
        </mirror>
        <mirror>
            <id>repo2</id>
            <mirrorOf>central</mirrorOf>
            <name>Human Readable Name for this Mirror.</name>
            <url>http://repo2.maven.org/maven2/</url>
        </mirror>
        <mirror>
            <id>OSChina</id>
            <name>OSChina Central</name>
            <url>http://maven.oschina.net/content/groups/public/</url>
            <mirrorOf>central</mirrorOf>
        </mirror>
        <mirror>
            <id>nexus-osc-thirdparty</id>
            <mirrorOf>thirdparty</mirrorOf>
            <name>Nexus osc thirdparty</name>
            <url>http://maven.oschina.net/content/repositories/thirdparty/</url>
        </mirror>
    </mirrors>

第三步:修改IDEA中的maven配置
