我不是造水的人,只是个小白在运水。
WD MyCloud拆解文章(大家可以提供更多相关文章)
http://www.chiphell.com/thread-1149363-1-1.html
http://shaiwu.smzdm.com/p/29905
拆开后西数数据是不负责保修的切记切记。
WD MyCloud在各种忙活的时候功率能够达到11.12w(单盘),开机瞬间峰值
达到过22w。
在脱机P2P下载的时候,功率在9.68w到10.6w左右(单盘)。
2015年03年27日目前为止可以实现aria2(ssh下安装)+ftp+ssh+smb
+transmission+迅雷(ssh下安装)+芒果云(KODExplorer)+xfce/lxde系统桌面(VNC远程,去桌面挂个webqq啥的)+wol远程唤醒局域网内其他机器+自动关机+USB备份等
基本满足nas的需求
wd my cloud只能折腾到此了!
Btsync与Rsync已安装未使用(百度云自己研究备份吧!)
mysql未安装上
owncloud安装必成砖我不会弄
PLEX server未测试
http://www.nasyun.com/thread-24115-3-1.html
所有在SSH下安装的插件如果有源直接安装源更安全(插件安装不安全)
本人安装openmediavault系统N遍!为了写教程又重新安装了一遍检查是否成
功!
滤镜测试完毕到时候发出第一个jz1024 v1.0 beta1版本
基于openmediavault_1.0.23版本安装各种升级后的版本
wd my cloud信息显示信息如下
版本为1.16(kralizec)
内核Linux3.2.26
cpu:ARMv7 Processor rev1(v7l)
使用工具
putty_V0.63.0.0.43510830.exe
winscp432
自行百度搜索
上面废话完毕后,下面才是正经的东西。
############################################################
1、拆机接pc安装openmediavault_1.0.23系统
WD MyCloud拆解文章(大家可以提供更多相关文章地址)
http://www.chiphell.com/thread-1149363-1-1.html
http://shaiwu.smzdm.com/p/29905
安装openmediavault系统
http://www.nasyun.com/thread-24104-1-1.html
2、修改openmediavault系统web管理界面语言为中文简体
http://mycloud/
用户名/密码: ssh: root/mycloud (openmediavault web界面登录:admin/mycloud)
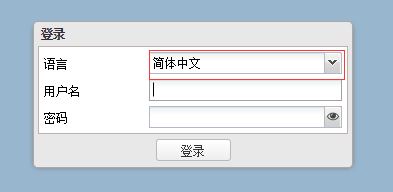
进入openmediavault系统界面,登录的时候有选择语言,进入系统后也有,
右边三黑条然后选择Language–简体中文

3、更新源地址
打开winscp
找到以下路径
/etc/apt/sources.list
修改里面的内容为
#deb http://ftp.debian.org/debian wheezy main contrib non-free
#deb http://ftp.debian.org/debian wheezy-updates main contrib non-free
#deb http://security.debian.org/ wheezy/updates main contrib non-free
deb http://ftp.cn.debian.org/debian wheezy main contrib non-free
deb http://ftp.cn.debian.org/debian wheezy-updates main contrib non-free
deb http://ftp.cn.debian.org/debian/ wheezy-proposed-updates main contrib non-free
deb http://ftp.cn.debian.org/debian wheezy-backports main contrib non-free
4、在ssh下不是俄语改系统编码为中文
在SSH下输入
dpkg-reconfigure locales
然后出现界面选择
zh_CN.UTF-8 UTF-8
*这里注意用tab键进行选择,用空格键进行确定,上下键选择,切记。
更新完毕后rboot重启系统
看中文安装还是能看懂的!我E文不好。(别从这装E文,到时候自己解决不了,乖乖的修改为中文。)
5、更新系统
安装完系统后必须更新系统切记否则安装插件必成砖
在SSH下输入
apt-get update
更新完毕后在继续输入下面的命令更新
apt-get upgrade
更新完毕后rboot重启系统
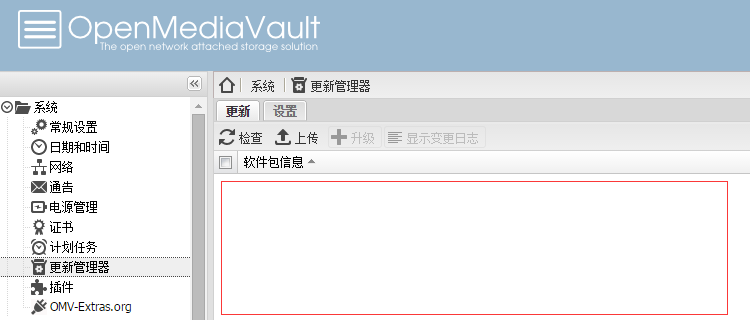
6、进入web界面选择系统–更新管理器
把里面的全选上,点升级。
以上纯净版版本下载地址请关注我的博客我更新上去后先更新博客后更新这篇文章
http://www.xiaoyebailong.com
##################################################################
aria2安装
把aria2的文件夹,放到/etc里面,将aria2c放到/etc/init.d下面,然后给
0774的权限.
配置etc/aria2文件夹中的aria2.conf,修改下载路径等。
添加开机自启动insserv /etc/init.d/aria2c
下载目录地址为:
dir=/media/6b7bexx-3d2f-xxxx-xxd6-xx5960bxxx/shares/Download/
服务停止命令:/etc/init.d/aria2c stop/start
卸载:apt-get remove aria2
aria2链接: http://pan.baidu.com/s/1eQzqg06 密码: qnei
aria2web页面链接: http://pan.baidu.com/s/1mgiOPEo 密码: tmhp
##########################################
transmission
在服务-bittorrent下载里设置
选中启用
密码修改一下成自己的
再到“文件和位置”
共享文件夹点击选中一下
未完成那随便选中不选中,我选择选中文件不乱
点保存,点应用
web单独管理地址
http://mycloud:9091
transmission管理界面是英文的
我们可以换成中文界面
打开/usr/share/transmission/web目录,修改index.html文件名为
index.original.html
把transmission-control-full.tar.gz解压
web文件夹内的东西全部复制丢进这个目录下即可
##########################################
挂载硬盘
在web管理下找到存储器–文件系统
选中sda4,点上面的挂载
然后等会出现黄色的条点应用yes
附件链接: http://pan.baidu.com/s/1bn8jFT9 密码: icdw
##########################################
网上邻居共享文件夹操作
在web管理下找到访问权限管理–共享文件夹
右边点添加
出现后点,卷就一个选中
路径点后选shares下面都可以选中共享
我选中了Download
填写上名称Download还是这个名字好管理好查看
点启用,点保存,点应用
再点服务–SMB/CIFS

右边点启用选上
点共享
添加启动,共享文件夹就刚才设置那个
公开那选择允许访客(如果加密码的话还得建立用户选项)
点保存点应用
##########################################
迅雷安装
在根目录新建立个文件夹名为xunlei
mkdir xunlei
然后把压缩包文件上传上去
在ssh下输入
#进入目录
cd /xunlei
#给迅雷程序加执行权限
chmod 777 * -R
#使用以下命令启动迅雷:
./portal
#等安装完后出现类似下面的内容:
initing…
try stoppingxunlei service…
killall:ETMDaemon: no process killed
killall:EmbedThunderManager: no process killed
setting xunleiruntime env…
port: 9000 isusable.
your control port is: 9000.
startingxunlei service…
execv:/home/shdxiang/test/lib/ETMDaemon.
getting xunleiservice info…
Connecting to127.0.0.1:9000 (127.0.0.1:9000)
portal.tmp 0T –:–:– ETA
THE ACTIVE CODE IS: TSK2A4
go tohttp://yuancheng.xunlei.com, bind your device with the active
code.
finished.
就表示安装完成了。
打开http://yuancheng.xunlei.com
在绑定设备那输入绑定码TSK2A4
默认下载目录为/TDdownload
在迅雷中我们修改为/shares/Download
#加入到启动中
第一步
cp /xunlei/xunlei /etc/init.d/xunlei
第二步
chmod +x /etc/init.d/xunlei
第三步
insserv /etc/init.d/xunlei
附件链接: http://pan.baidu.com/s/1c0pkLag 密码: wgaa
##########################################
xfce/lxde系统桌面与VNC远程
这个没仔细搞明白外其他那几个基本都可以在系统插件中安装
##########################################
备份系统
http://www.cnblogs.com/zeroone/archive/2012/09/13/2683729.html下面是各种命令希望能用到
cat /proc/scsi/scsi
查看硬盘信息
top
查看进程(也可以在WEB页面查看进程)
apt-cache search xxxx
搜索资源
apt-get install xxxx
安装命令
apt-get remove xxxx
卸载
free -m
查看内存
lsof -i:9000
占用端口9000为要查的9000端口自己更改
http://www.cnblogs.com/zeroone/archive/2012/09/13/2683729.html下面是各种命令希望能用到
cat /proc/scsi/scsi
查看硬盘信息
top
查看进程(也可以在WEB页面查看进程)
apt-cache search xxxx
搜索资源
apt-get install xxxx
安装命令
apt-get remove xxxx
卸载
free -m
查看内存
lsof -i:9000
占用端口9000为要查的9000端口自己更改
gnome kde xfce lxde 四种桌面
参考网址
http://www.laozuo.org/2932.html (安装LXDE+VNC桌面)
http://blog.chinaunix.net/uid-14121858-id-216359.html
http://www.jb51.net/os/Ubuntu/104948.html
http://blog.csdn.net/stormbjm/article/details/9117599
http://www.zxsdw.com/index.php/archives/22/?page=1
##########################################
模糊状安装
LXDE+VNC桌面
ssh下输入
1、
apt-get update
apt-get upgrade
2、
apt-get install education-desktop-lxde
apt-get install tightvncserver
apt-get install lxde
apt-get install task-lxde-desktop
tightvncserver :1
输入密码并记得住
3、
vi /root/.vnc/xstartuplxterminal &
/usr/bin/lxsession -s LXDE &
ssh下输入
1、
apt-get update
apt-get upgrade
2、
apt-get install education-desktop-lxde
apt-get install tightvncserver
apt-get install lxde
apt-get install task-lxde-desktop
tightvncserver :1
输入密码并记得住
3、
vi /root/.vnc/xstartuplxterminal &
/usr/bin/lxsession -s LXDE &
3、
chmod +x ~/.vnc/xstartup
service vncserver restart
chkconfig vncserver on
打开vnc输入下面的ip根据自己情况来
192.168.1.134:5901
输入密码
参考http://www.laozuo.org/2932.html
暂停vnc
tightvncserver -kill :1
4、安装浏览器
apt-get install iceweasel-l10n-zh-cn
没加到启动项里
每次启动在SSH下输入
tightvncserver :1
能用VNC链接远程桌面
桌面上没东西
##########################################
感谢
Something′(191106405)、songming.me(254462713)、大连@一天(16001648)
等其他帮助过我的人!有时间整理其他帮助过我的人。
感谢
Something′(191106405)、songming.me(254462713)、大连@一天(16001648)
等其他帮助过我的人!有时间整理其他帮助过我的人。


